Updated Vishwas Sharma Tutorial 8 min read
How to Automatically Add and Export Subtitles for Any Video
Generate accurate subtitles automatically, then customize the font style, size, color, transparency, and position. Burn them into your video or export an SRT — all in a few clicks.
Let’s be honest — almost nobody watches videos with the sound on anymore.
They’re scrolling TikTok on mute in a waiting room. Watching a Reel on a noisy train. Half-listening to a YouTube tutorial while doing something else. Whatever the reason, if your video doesn’t have subtitles, a huge chunk of your audience is missing the point entirely — and probably scrolling past.
The old fix was typing out subtitles by hand, timing every line, and exporting a subtitle file that never quite looked right. That’s not how it works anymore.
In this guide, I’ll walk through exactly how to auto-generate subtitles in AspectShift-HtoV, and — more importantly — how to make them actually look like your brand instead of a generic caption template. That means picking from 10 built-in font styles, adjusting size, color, and opacity, and positioning subtitles exactly where you want them (or letting the app handle placement automatically across different aspect ratios).
Why Subtitles Matter More Than You Think
This isn’t just an accessibility checkbox. Subtitles directly affect how your videos perform.
- Sound-off viewing is the default now. Most social feeds autoplay muted. No subtitles means no message.
- Watch time goes up. Viewers stick around longer when they can follow along even in a loud or quiet environment.
- Accessibility matters. Deaf and hard-of-hearing viewers, plus non-native speakers, rely on captions to follow along.
- Reach compounds. Platforms increasingly favor content that keeps people watching — and captioned videos tend to hold attention longer.
- One asset, many platforms. Generate once, then burn in for social or export as SRT for YouTube — no re-typing anything.
Whether you’re making TikToks, Instagram Reels, YouTube Shorts, or full-length tutorials, subtitles aren’t optional anymore. If you’re also converting horizontal footage for these platforms, our guide to the best aspect ratio for Shorts, TikTok, and Reels covers which format to use where.
Step 1 — Import Your Video
Open AspectShift-HtoV and drop your video in.
That’s the entire step. The app preps the file for processing in the background.
Note: Longer videos take a little more time to analyze than short clips — that’s normal, the AI is transcribing every word.
Step 2 — Turn On Automatic Subtitles
Head to the Subtitles section and enable:
- ✅ Burn Subtitles
From here, AspectShift-HtoV uses AI speech recognition to listen to your audio track, transcribe it, and generate properly timed subtitles automatically.
No manual typing. No fiddling with timestamps. No wrestling with a giant subtitle file in a text editor.
Step 3 — Make the Subtitles Actually Look Good
This is where AspectShift-HtoV goes further than most basic auto-caption tools. Once your subtitles are generated, you’re not stuck with one default look — you get a full styling toolkit.
Pick From 10 Built-In Font Styles
Instead of manually hunting for fonts or fighting with a design tool, just choose a style that matches the vibe of your video:
- Clean — simple, neutral, and easy to read for any type of content
- Minimal — subtle and understated, stays out of the way of your footage
- Caption — classic subtitle look, familiar and highly readable
- Meme — bold, punchy text built for humor and reaction content
- Creator — modern style built for influencer and lifestyle content
- Gaming — high-energy look suited to gameplay and esports clips
- Cyberpunk — neon-inspired, futuristic styling for edgy content
- Cinematic — polished, film-style captions for a more premium feel
- Retro — nostalgic, throwback aesthetic for a vintage vibe
- Handwritten — casual, personal-feeling text that looks hand-lettered
(Handwritten is my personal favorite — it gives videos a much more casual, human feel instead of looking like every other captioned clip on your feed.)
Adjust Size, Color, Transparency, and Opacity
Beyond the font style itself, you can fine-tune:
- Size — make subtitles bigger for readability on mobile, or smaller so they don’t dominate the frame
- Color — match your subtitle text to your brand colors or just make sure it stands out against your footage
- Transparency and opacity — control how much the background/text blends with the video underneath, from fully solid to fully see-through
This means two creators using the same “Clean” style can end up with completely different-looking subtitles depending on their brand.
Position Subtitles Exactly Where You Want
You’ve got two options here:
- Drag and reposition manually. Click and drag the subtitle box anywhere in the frame — above the center, near the top, off to one side, wherever fits your footage best.
- Leave it on auto-placement. If you don’t touch it, AspectShift-HtoV automatically adjusts subtitle position based on the aspect ratio you’re rendering to — so subtitles land in a sensible spot whether you’re exporting square, vertical, or widescreen, without you having to manually reposition for every format.
This is especially useful if you’re batch-converting one video into multiple aspect ratios — the subtitles adapt instead of ending up awkwardly placed or cut off.
Step 4 — Choose Burn-In, SRT Export, or Both
Option 1: Burn Subtitles Into the Video
Best for platforms like:
- TikTok
- Instagram Reels
- YouTube Shorts
- Facebook Reels
- Basically anywhere people scroll on mute
The subtitles become part of the video file itself, styled exactly the way you set them up — font, color, size, and position all baked in. They’ll always show up exactly as intended, no matter where the video gets uploaded or re-shared.
Option 2: Export an SRT File
Need subtitles as a separate file instead? Enable:
- Export SRT
AspectShift-HtoV generates a standard .srt subtitle file alongside your video. SRT files are supported by:
- YouTube
- Vimeo
- Most video players
- Streaming platforms
- Nearly every video editor
This is the better route if you want viewers to be able to toggle subtitles on or off themselves.
You can also enable both at once — a lot of creators do this so they end up with a finished, styled video and a reusable subtitle file for other platforms.
Step 5 — Click Export
Once your subtitles are generated and styled the way you like, click Export. AspectShift-HtoV handles the rest automatically:
- Transcribes speech with AI
- Times and syncs subtitles to the audio
- Applies your chosen font style, size, color, and opacity
- Positions subtitles based on your manual placement or the selected aspect ratio
- Burns subtitles into the video (if enabled)
- Exports an SRT file (if enabled)
No extra steps. No re-checking timing. It just works.
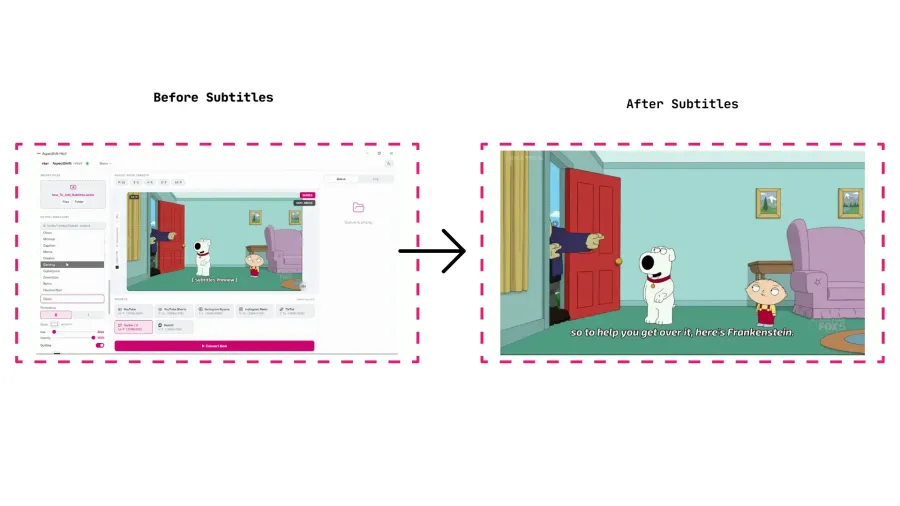
Here is what the finished result looks like after export:
Burned-In Subtitles vs. SRT Files: Which Should You Use?
| Best for | Why | |
|---|---|---|
| Burned-in subtitles | TikTok, Reels, Shorts, social media | Viewers see them automatically, no toggling required |
| SRT files | YouTube uploads, online courses, archives, professional workflows | Keeps subtitles separate and toggleable, easier to edit or translate later |
If you’re not sure, a good default is: burn in subtitles for anything going straight to social, and export SRT for anything going to YouTube or a long-form platform.
Frequently Asked Questions
Do I have to type anything to generate subtitles?
No. The AI listens to your video’s audio track and generates subtitles automatically — no manual transcription needed.
Can I change how the subtitles look, or am I stuck with a default style?
You get full control. Choose from 10 font styles (Clean, Minimal, Caption, Meme, Creator, Gaming, Cyberpunk, Cinematic, Retro, and Handwritten), then adjust size, color, transparency, and opacity to match your video.
Can I move the subtitles to a different spot on screen?
Yes. Drag and reposition subtitles anywhere in the frame manually, or leave them on the default setting — AspectShift-HtoV will automatically adjust their placement based on the aspect ratio you’re exporting to.
Will my subtitle styling stay consistent across different aspect ratios?
Yes, if you leave positioning on auto, the app adjusts placement per aspect ratio so subtitles don’t end up cropped or oddly placed when you convert between square, vertical, and widescreen formats.
Can I export only the SRT file without burning subtitles in?
Yes. You can enable SRT export on its own, without burning subtitles into the video.
Can I burn subtitles in and export an SRT file at the same time?
Absolutely. Many creators do this to get a finished, styled video plus a reusable subtitle file.
What is an SRT file?
An SRT (SubRip Subtitle) file is a plain text file containing subtitle timing and dialogue. It’s supported by most video platforms and editing software, and it’s easy to edit or translate later.
Final Thoughts
Auto-generating subtitles used to mean picking between “fast” and “good-looking.” Now you don’t have to choose.
AspectShift-HtoV transcribes your video automatically, then hands you real styling control — 10 font styles, adjustable size and color, opacity control, and flexible positioning that adapts across aspect ratios. Whether you want burned-in captions for social media or a clean SRT file for YouTube, the whole process takes a few clicks instead of a few hours.
If you’re already creating content regularly, styled automatic subtitles can easily become the single biggest upgrade to your editing workflow — and one of the easiest ways to keep viewers watching past the first three seconds.
Happy creating!